


“You have us outnumbered. But remember, it is not the size of the dog in the fight, it's the size of the fight in the dog. No one gets inside our circle!” - Commander Anubis Cruger, Power Rangers S.P.D.
I loved this project because I got to indulge in the anonymity of hiding the face. It also signified the beginning of creating everything myself, larger builds, and more complicated fabrication methods. In my opinion the 6th Rangers introduced in all the Power Rangers seasons turn out to be the coolest and the SPD Shadow Ranger is in my top ranking of 6th Rangers,
Starting with the head, I created the helmet from a free pepakura paper template. This was the most labor intensive part of the project, taking close to 3 months of sanding polyester putty and resin reinforcement. The end result was very heavy and scaling to my head was a problem but I was happy with the end result. The helmet hinge was 3D printed with my first printer and the helmet stays closed with the help of 6 pairs of neodymium magnets held in place with epoxy putty, The visor was just dyed PETG plastic sheet, and the custom color was made using metallic acrylic paints.
The armor was created with the help of reference images from the show as I streamed episode online. I also like to buy 6” inch figure (if available) for all my projects to get a sense for proportion. I accomplished patterning the armor by making a foam mannequin template with my body dimensions. From there I wrapped the entire thing in plastic wrap and tape to draw on with a marker. Once these tape patterns were cut out I transfered everything to posterboard to get cleaner versions for scanning. From there everything was transferred to various thicknesses of EVA Foam and assembled. The leg greaves are attached to some cheap military boots with contact cement and the bracers zipper close. The chest armor uses elastic to stay tight but also allows the user the breathe/move. The shoulder bells attach to the chest with Velcro but are free floating.
As mentioned before, this was done with the help of my first 3D printer. I also took a crack at 3D design with the help of TinkerCAD. The 3D printed elements include the belt buckle, the various badges on the shoulders/helmet, glove fingertips, and the Shadow Saber. The badges and fingertips I bought on 3D marketplaces but the buckle and sword I designed myself. The buckle is fully functional with the ability to open/close and store the handcuffs which also open/close. The Shadow Saber was designed with the show in mind, with the main feature of the opening and closing mouth on the hilt. The mouth opens and closes with the help of two axels with gears. My sword blade is made from LED diffusing foam with neopixel LEDs in the middle. The sword has a crawling energy animation and the microcontroller/charging port are located in the hollow handle behind a magnetic lid.

The final thing I made for this look was the jumpsuit. I found out about dyesub printing and custom zentai suits through lots of research. I got to use it the knowledge on other projects. I found a blank base pattern, loaded it onto a free Photoshop-esque webapp to size it, and added the appropriate stripes and solid black. The design was then sent off to ZentaiZentai for printing and sewing. I then added the corresponding velcro loops for the armor, leg stirrups, and a hood to put on under the helmet. The gloves were bought from a Etsy shop selling yard work gloves. I then added 3D printed finger tips and hand sculpted knuckles.
Everything I created to complete this look can be found in my Etsy shop. This includes: a foam version of the helmet, the bodysuit, the armor, the sword/buckle 3D STL files, and the foam mannequin pattern

Sizing up the pepakura file with my foam, duct tape dummy in the background

Assembling the pepakura

After three tries, I went with the middle helmet for my head

I used two part epoxy before I found out about fiberglass resin

The long and laborious process of sanding using polyester putty, glazing putty, and primer

Conceptualizing my Shadow Saber

Conceptualizing my Shadow Saber

Conceptualizing my Shadow Saber

Conceptualizing my Shadow Saber

The finished 3D model made in TinkerCAD

Once printed on my 3D printer, I used fiberglass resin to smooth print lines

Primed sword handle with filler primer

Plastazote foam sword with Neopixel crawling animation

Charging up of the sword before the HAG party debut

Fully designed containment cuff buckle in TinkerCAD

80 grit sanded belt buckle

Resin smoothed belt buckle with cuffs inside

Better look at the handcuffs

Construction of shoulder bells, with 5mm EVA Foam

Badges for the shoulder bells

The greaves are out to dry after being primed with plasti dip

Before I bought my own printer, I ordered this smaller badge to place on the forehead of my helmet

Now that its smoothed, I layed down a gloss black base

Custom ice blue airbrushed on

Trying on unfinished armor with helmet

PETG visor dyed with iDye Poly Black

Complete Helmet after gluing visor

Foam Bracer out to dry after being primed

Knuckles spray painted with a gloss black. They were cast with a quick resin from Hobby Lobby.

Finished glove, and bracer

Laying out the finished belt, bracers, and greaves

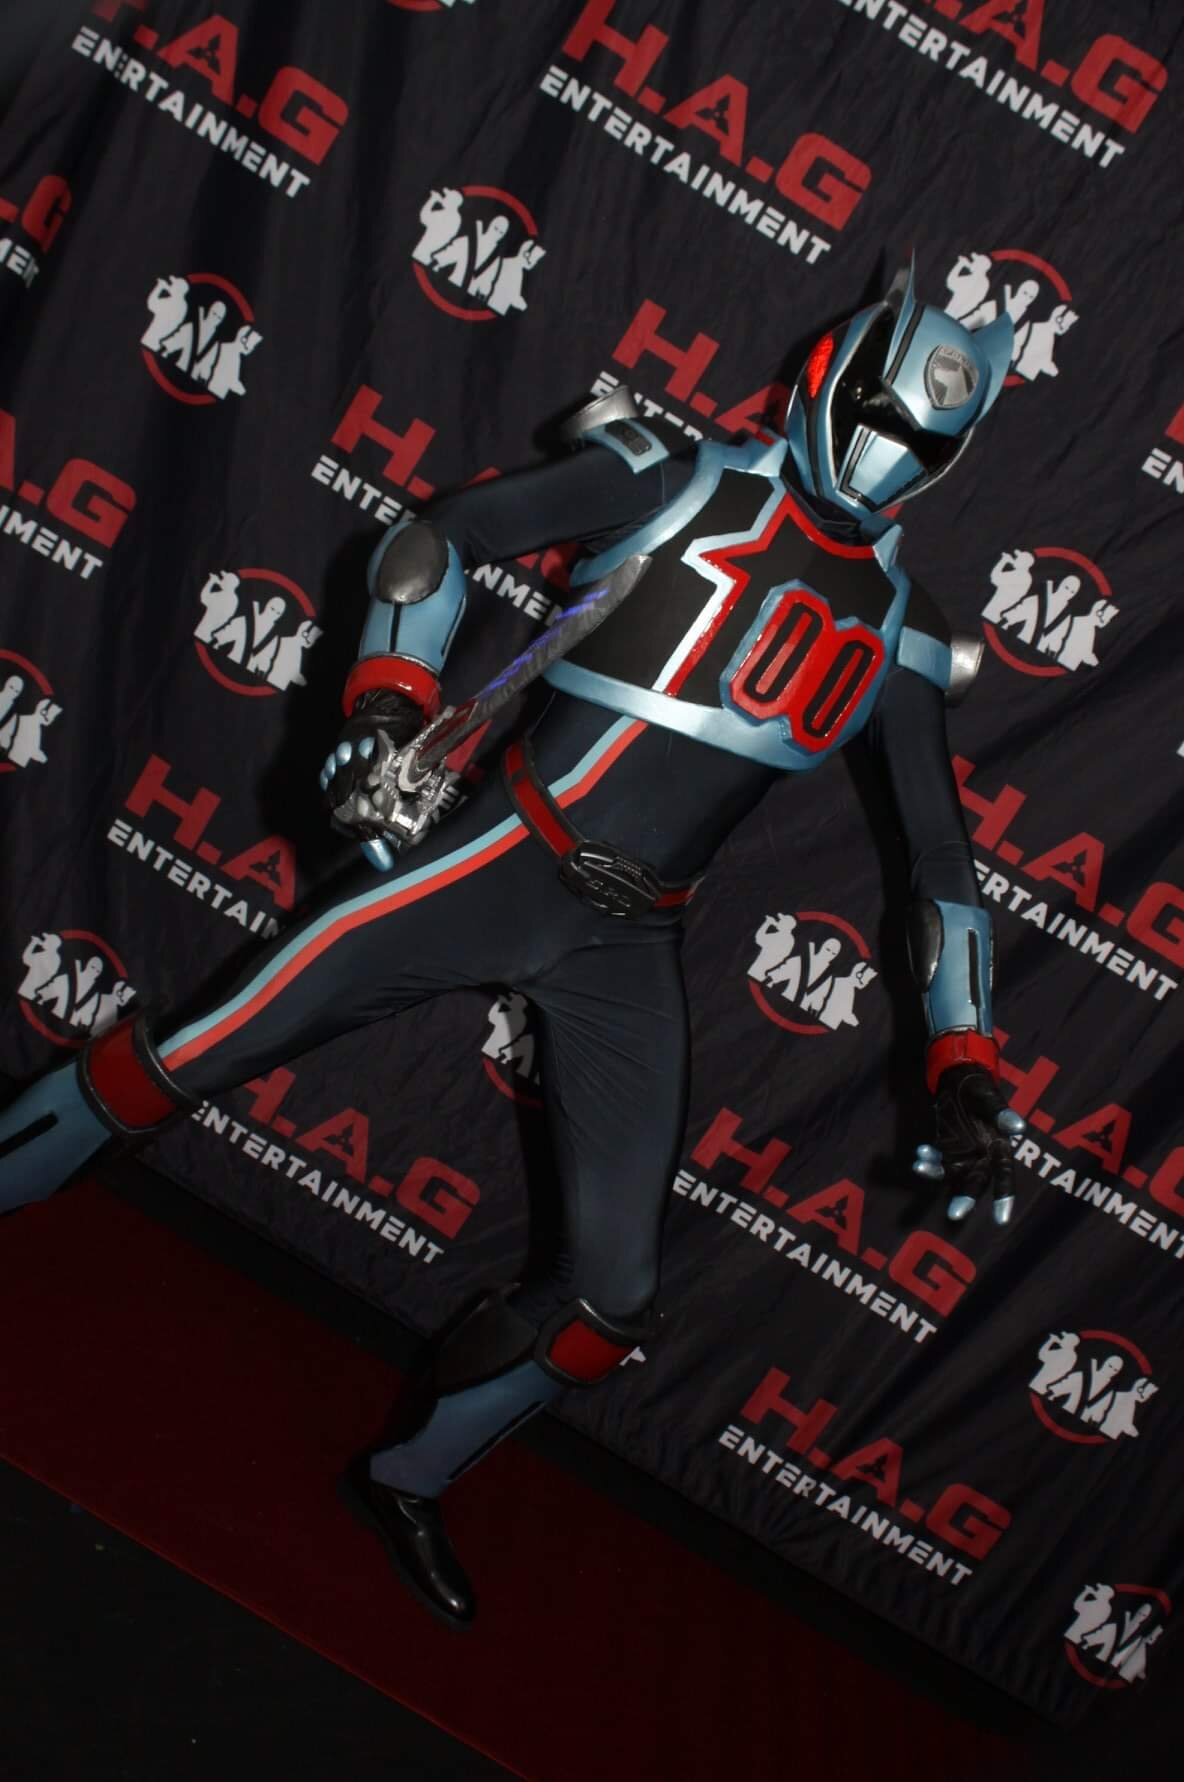
Signature pose

Primed Armor, with completed greaves and bracers

Priming the chest with plasti dip

More of my custom ice blue.

I masked off the blue sections so I can spray the red. No need to worry about overspray on the body. Painting over it on the black

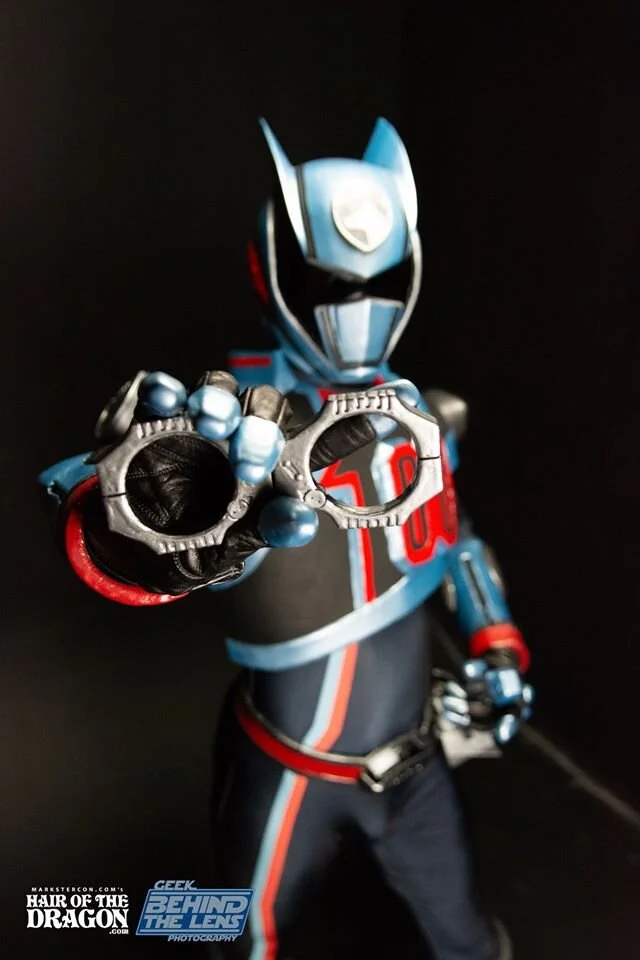
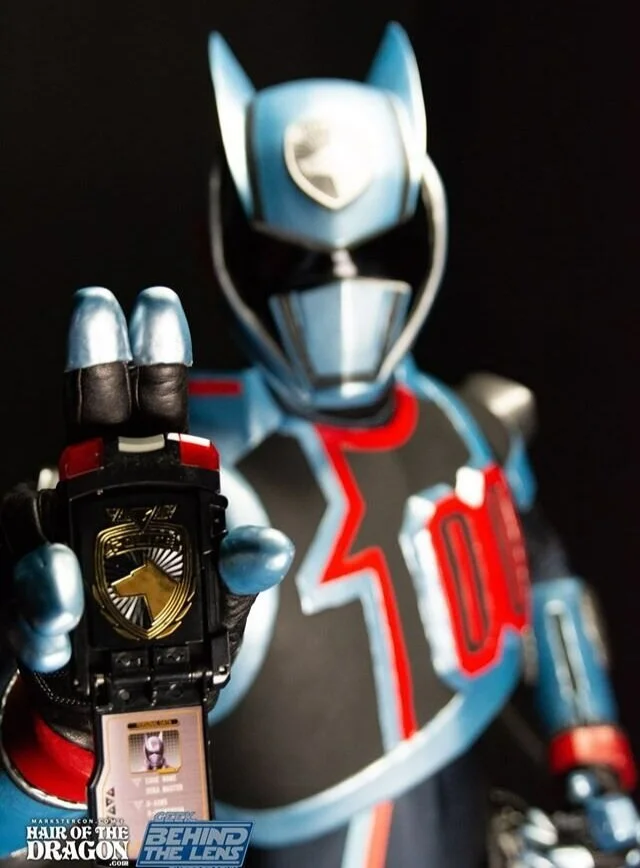
HOTD 2019
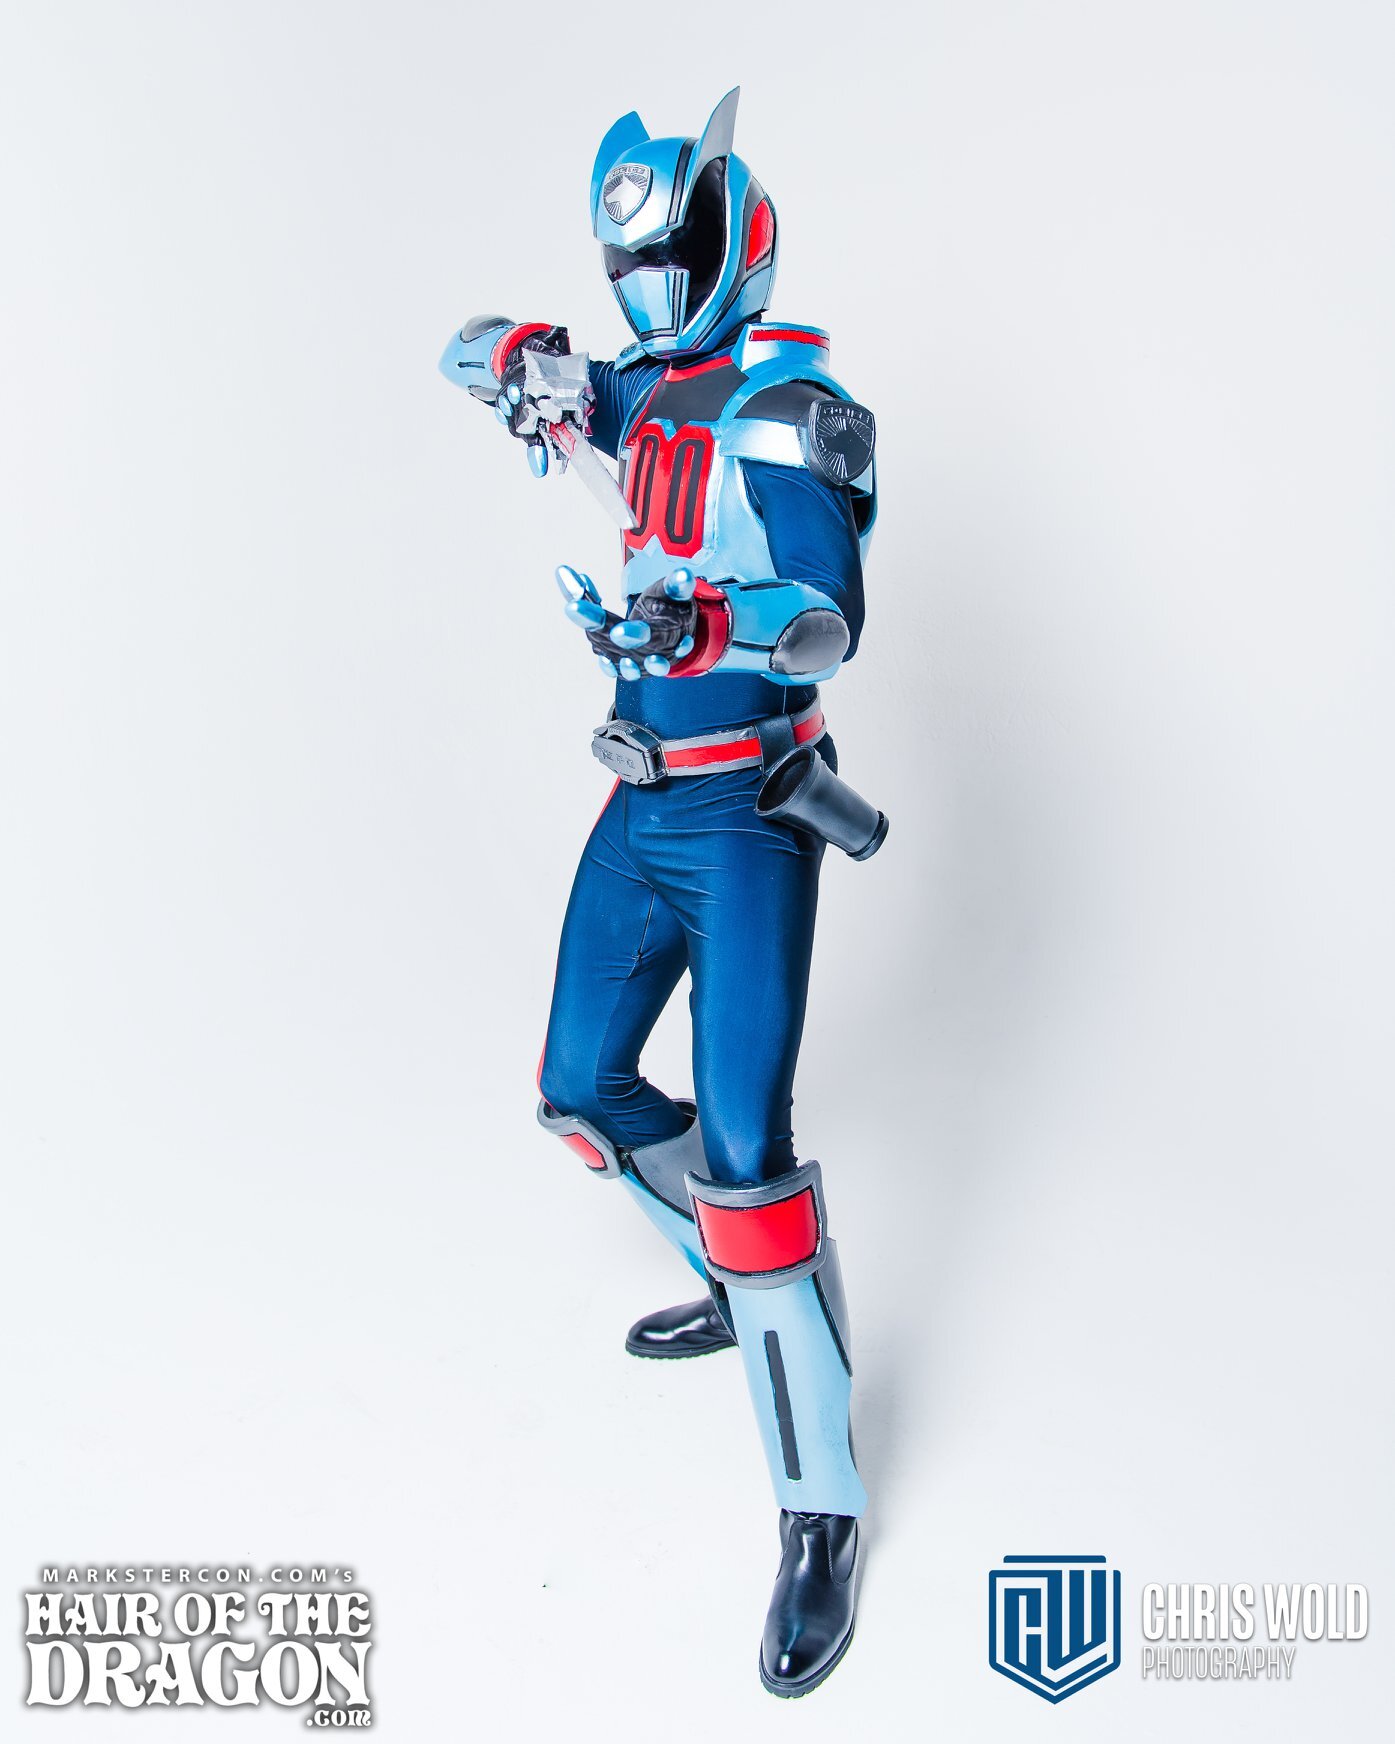
HOTD 2019

HOTD 2019

HOTD 2019
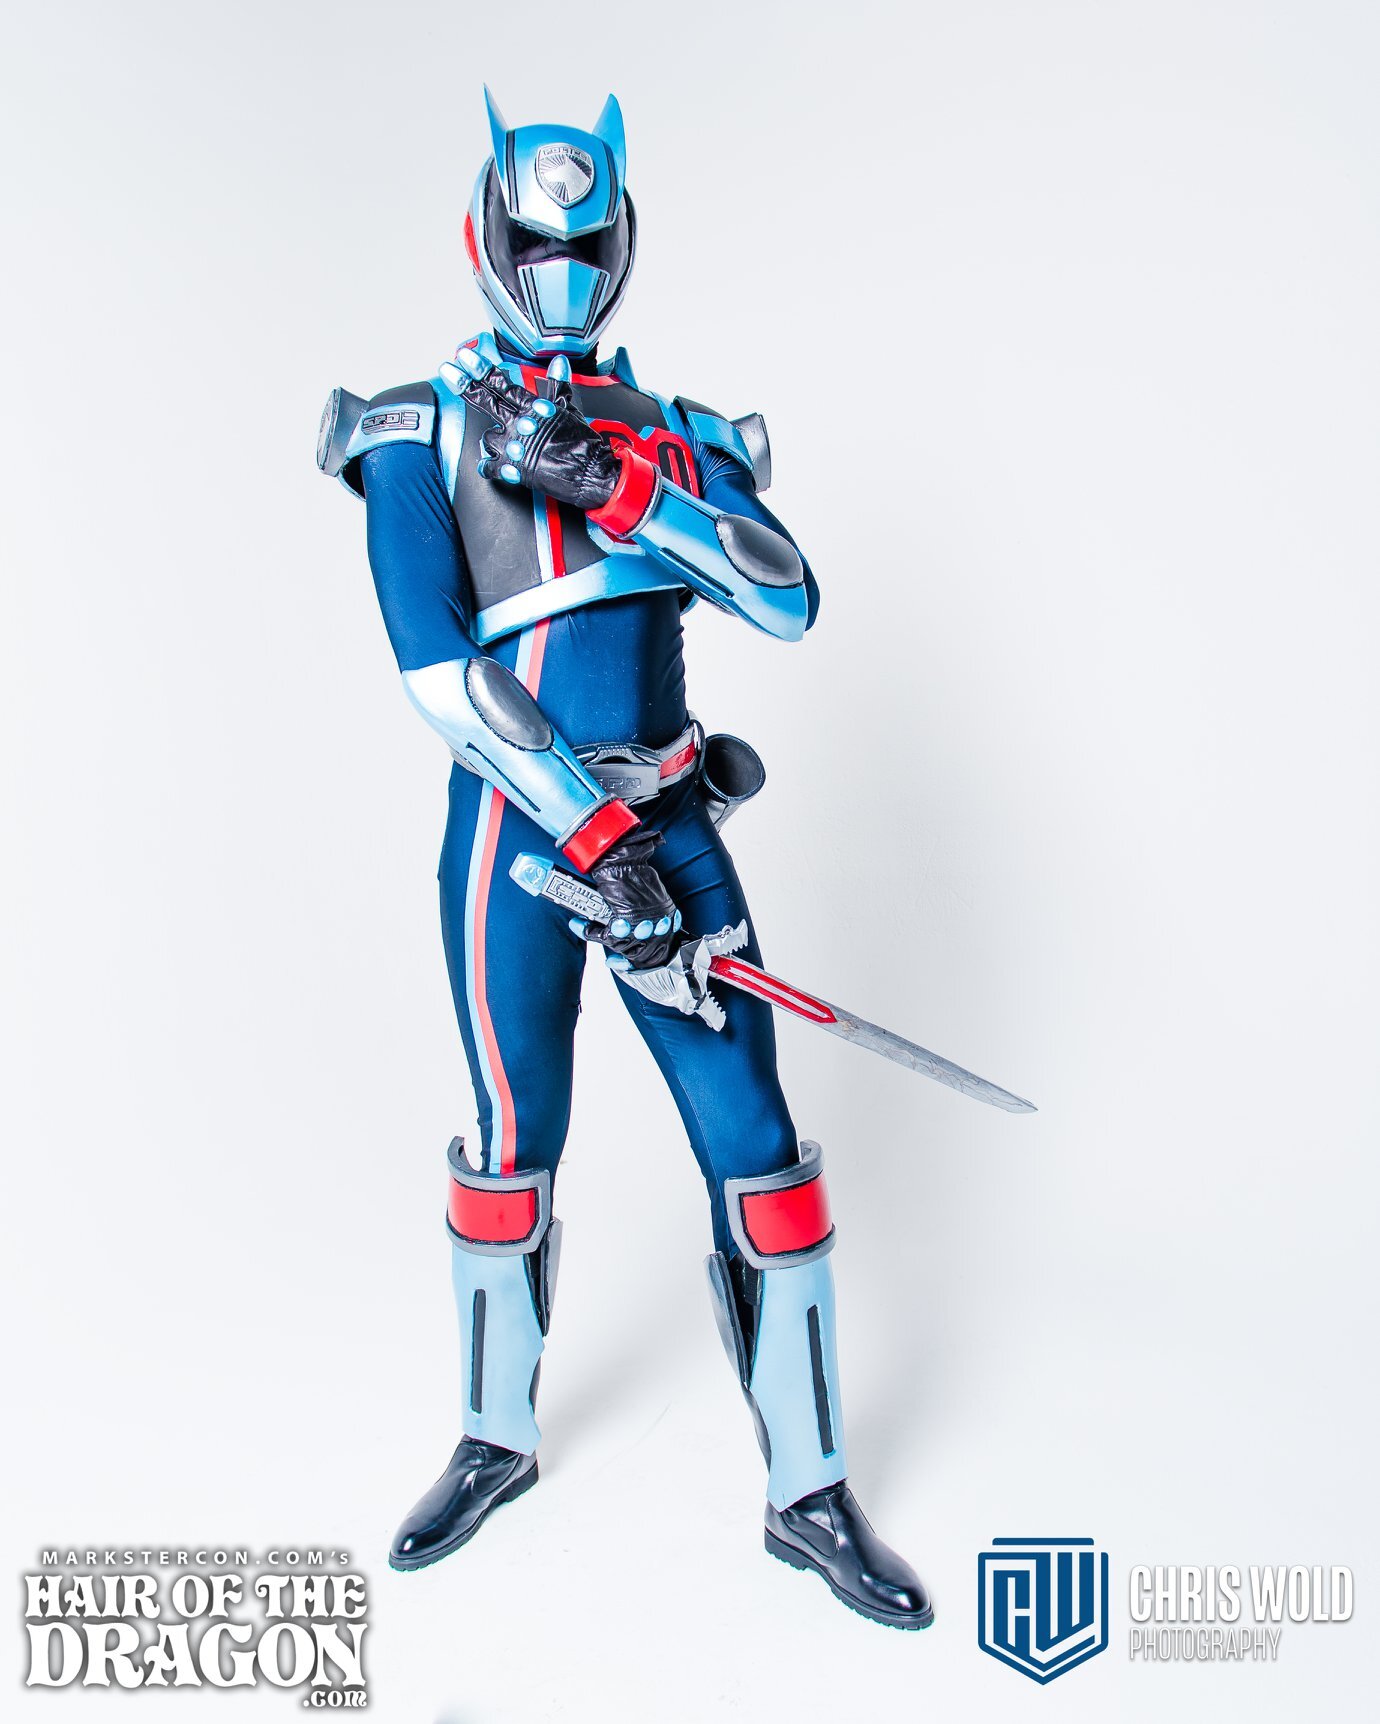
HOTD 2019

HOTD 2019

HOTD 2019

HOTD 2019
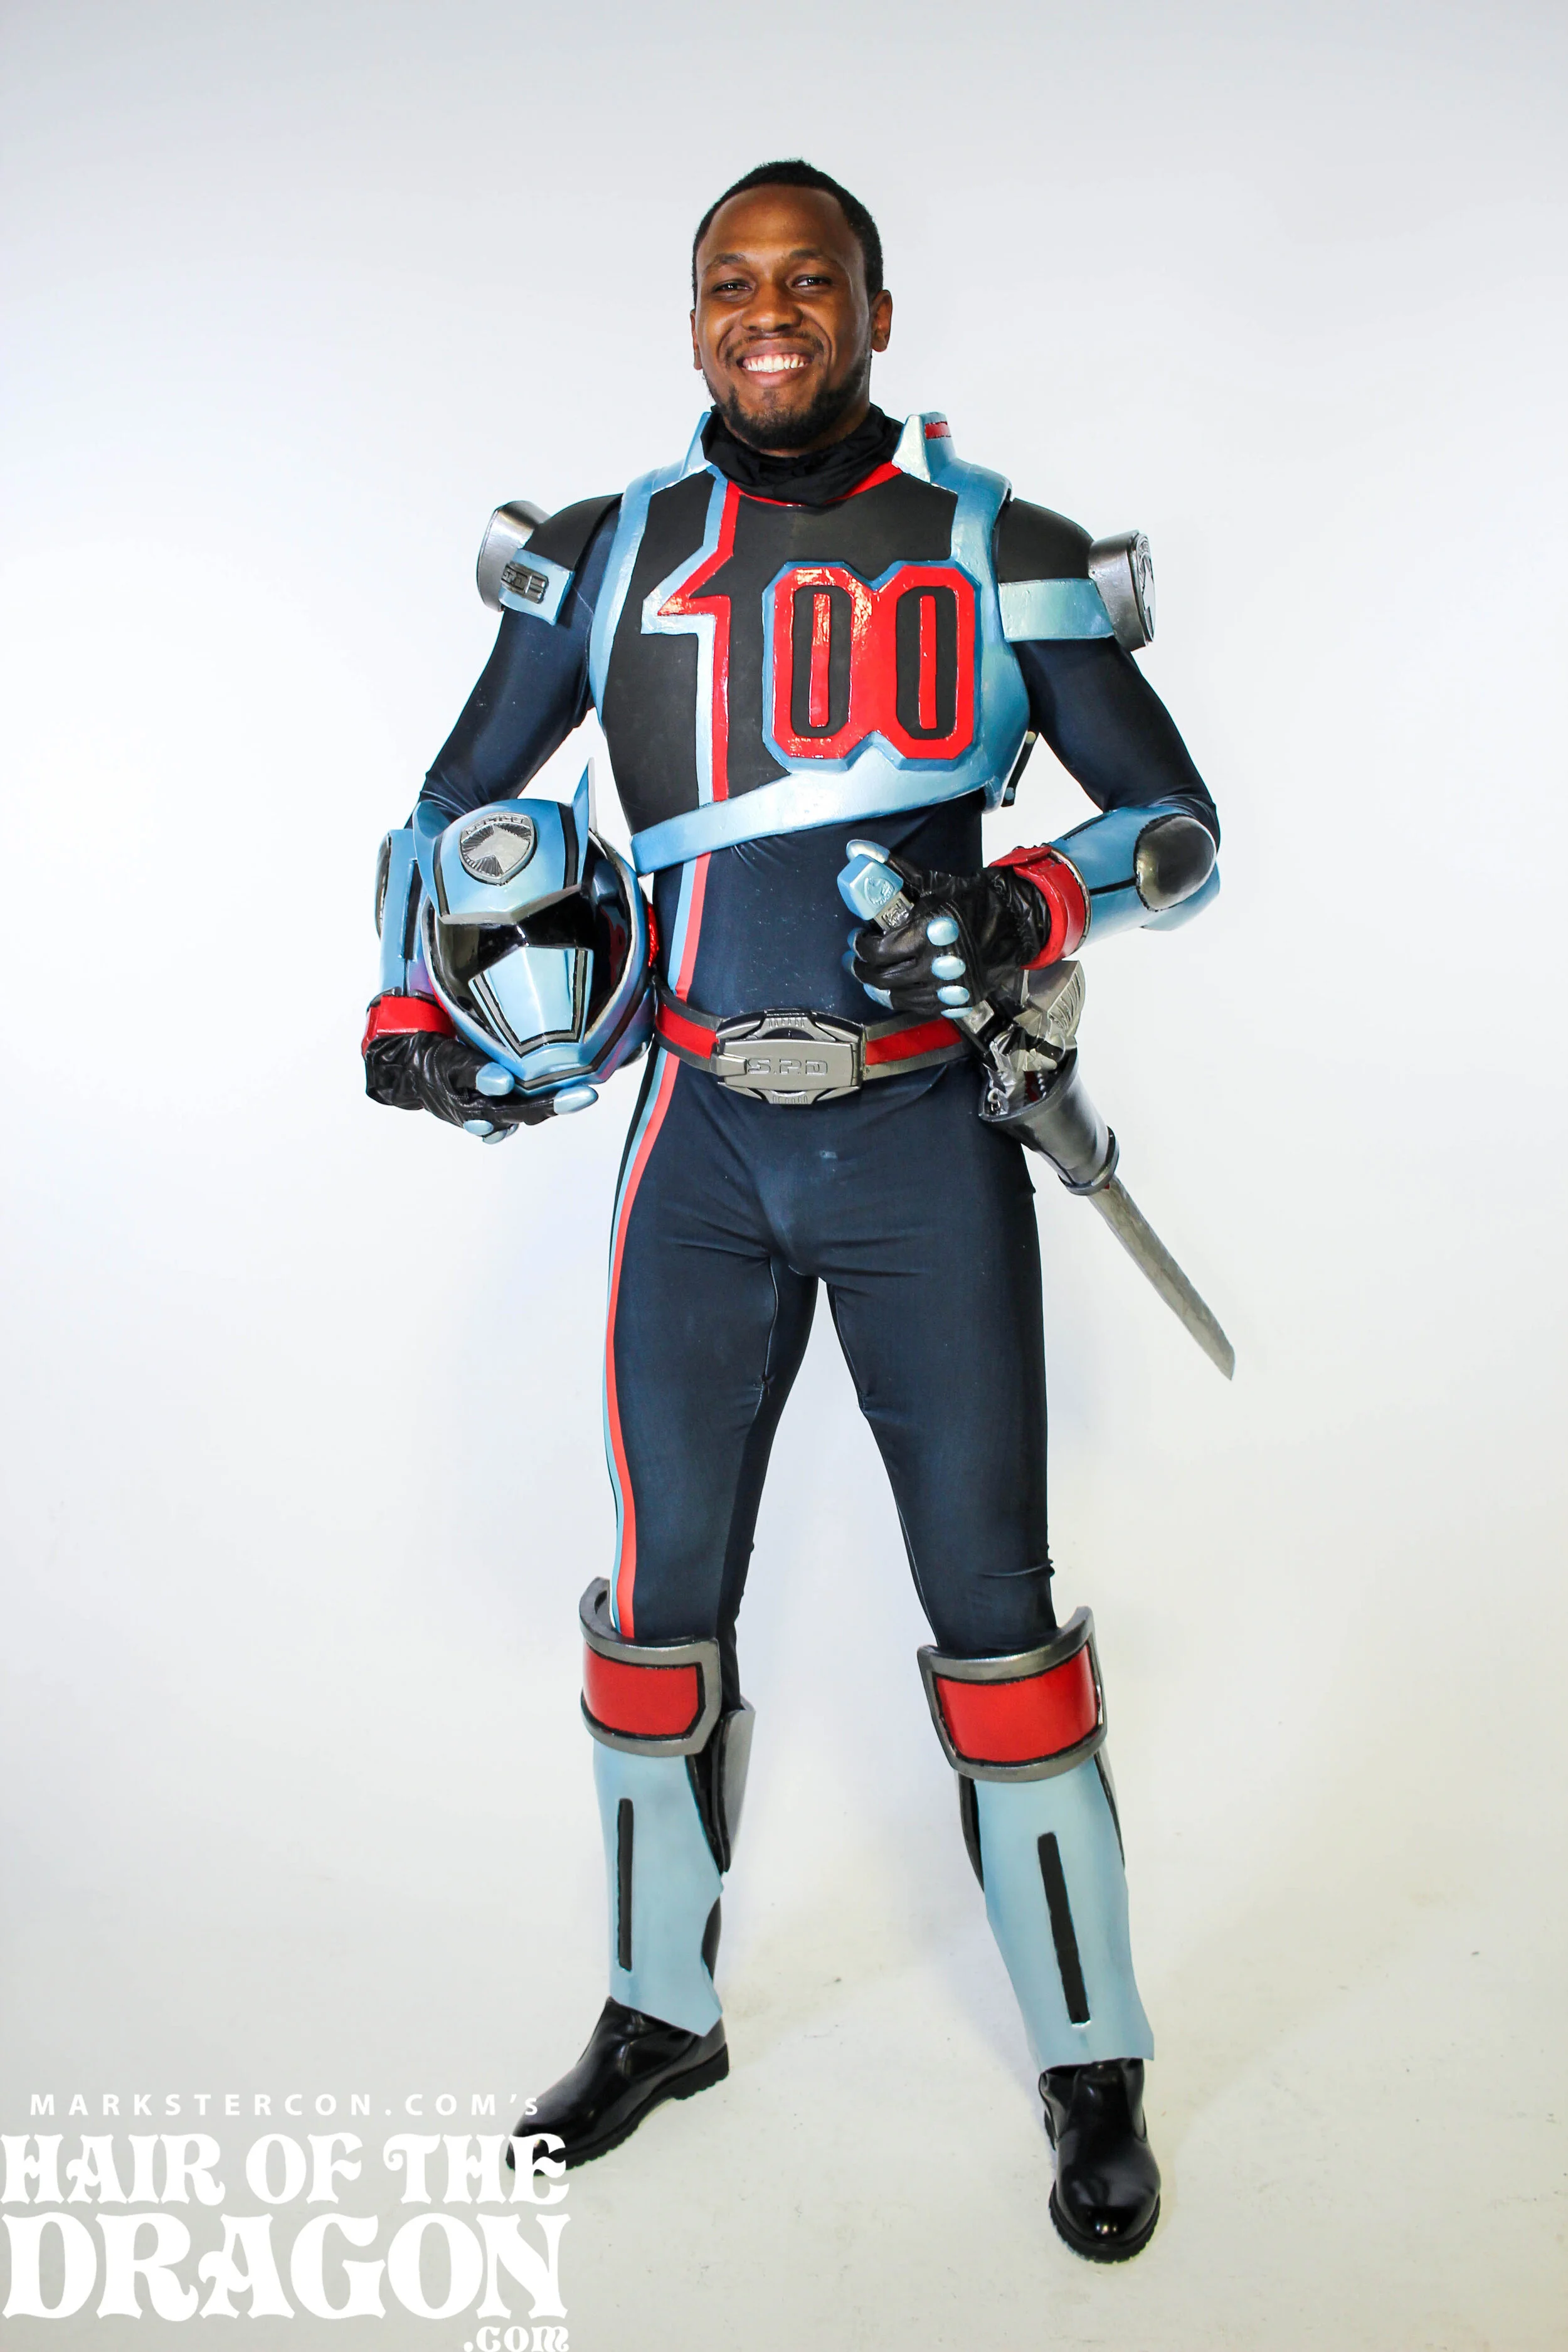
HOTD 2019
HOTD 2019

HOTD 2019

I used my Hasbro figure a lot for reference and sizing

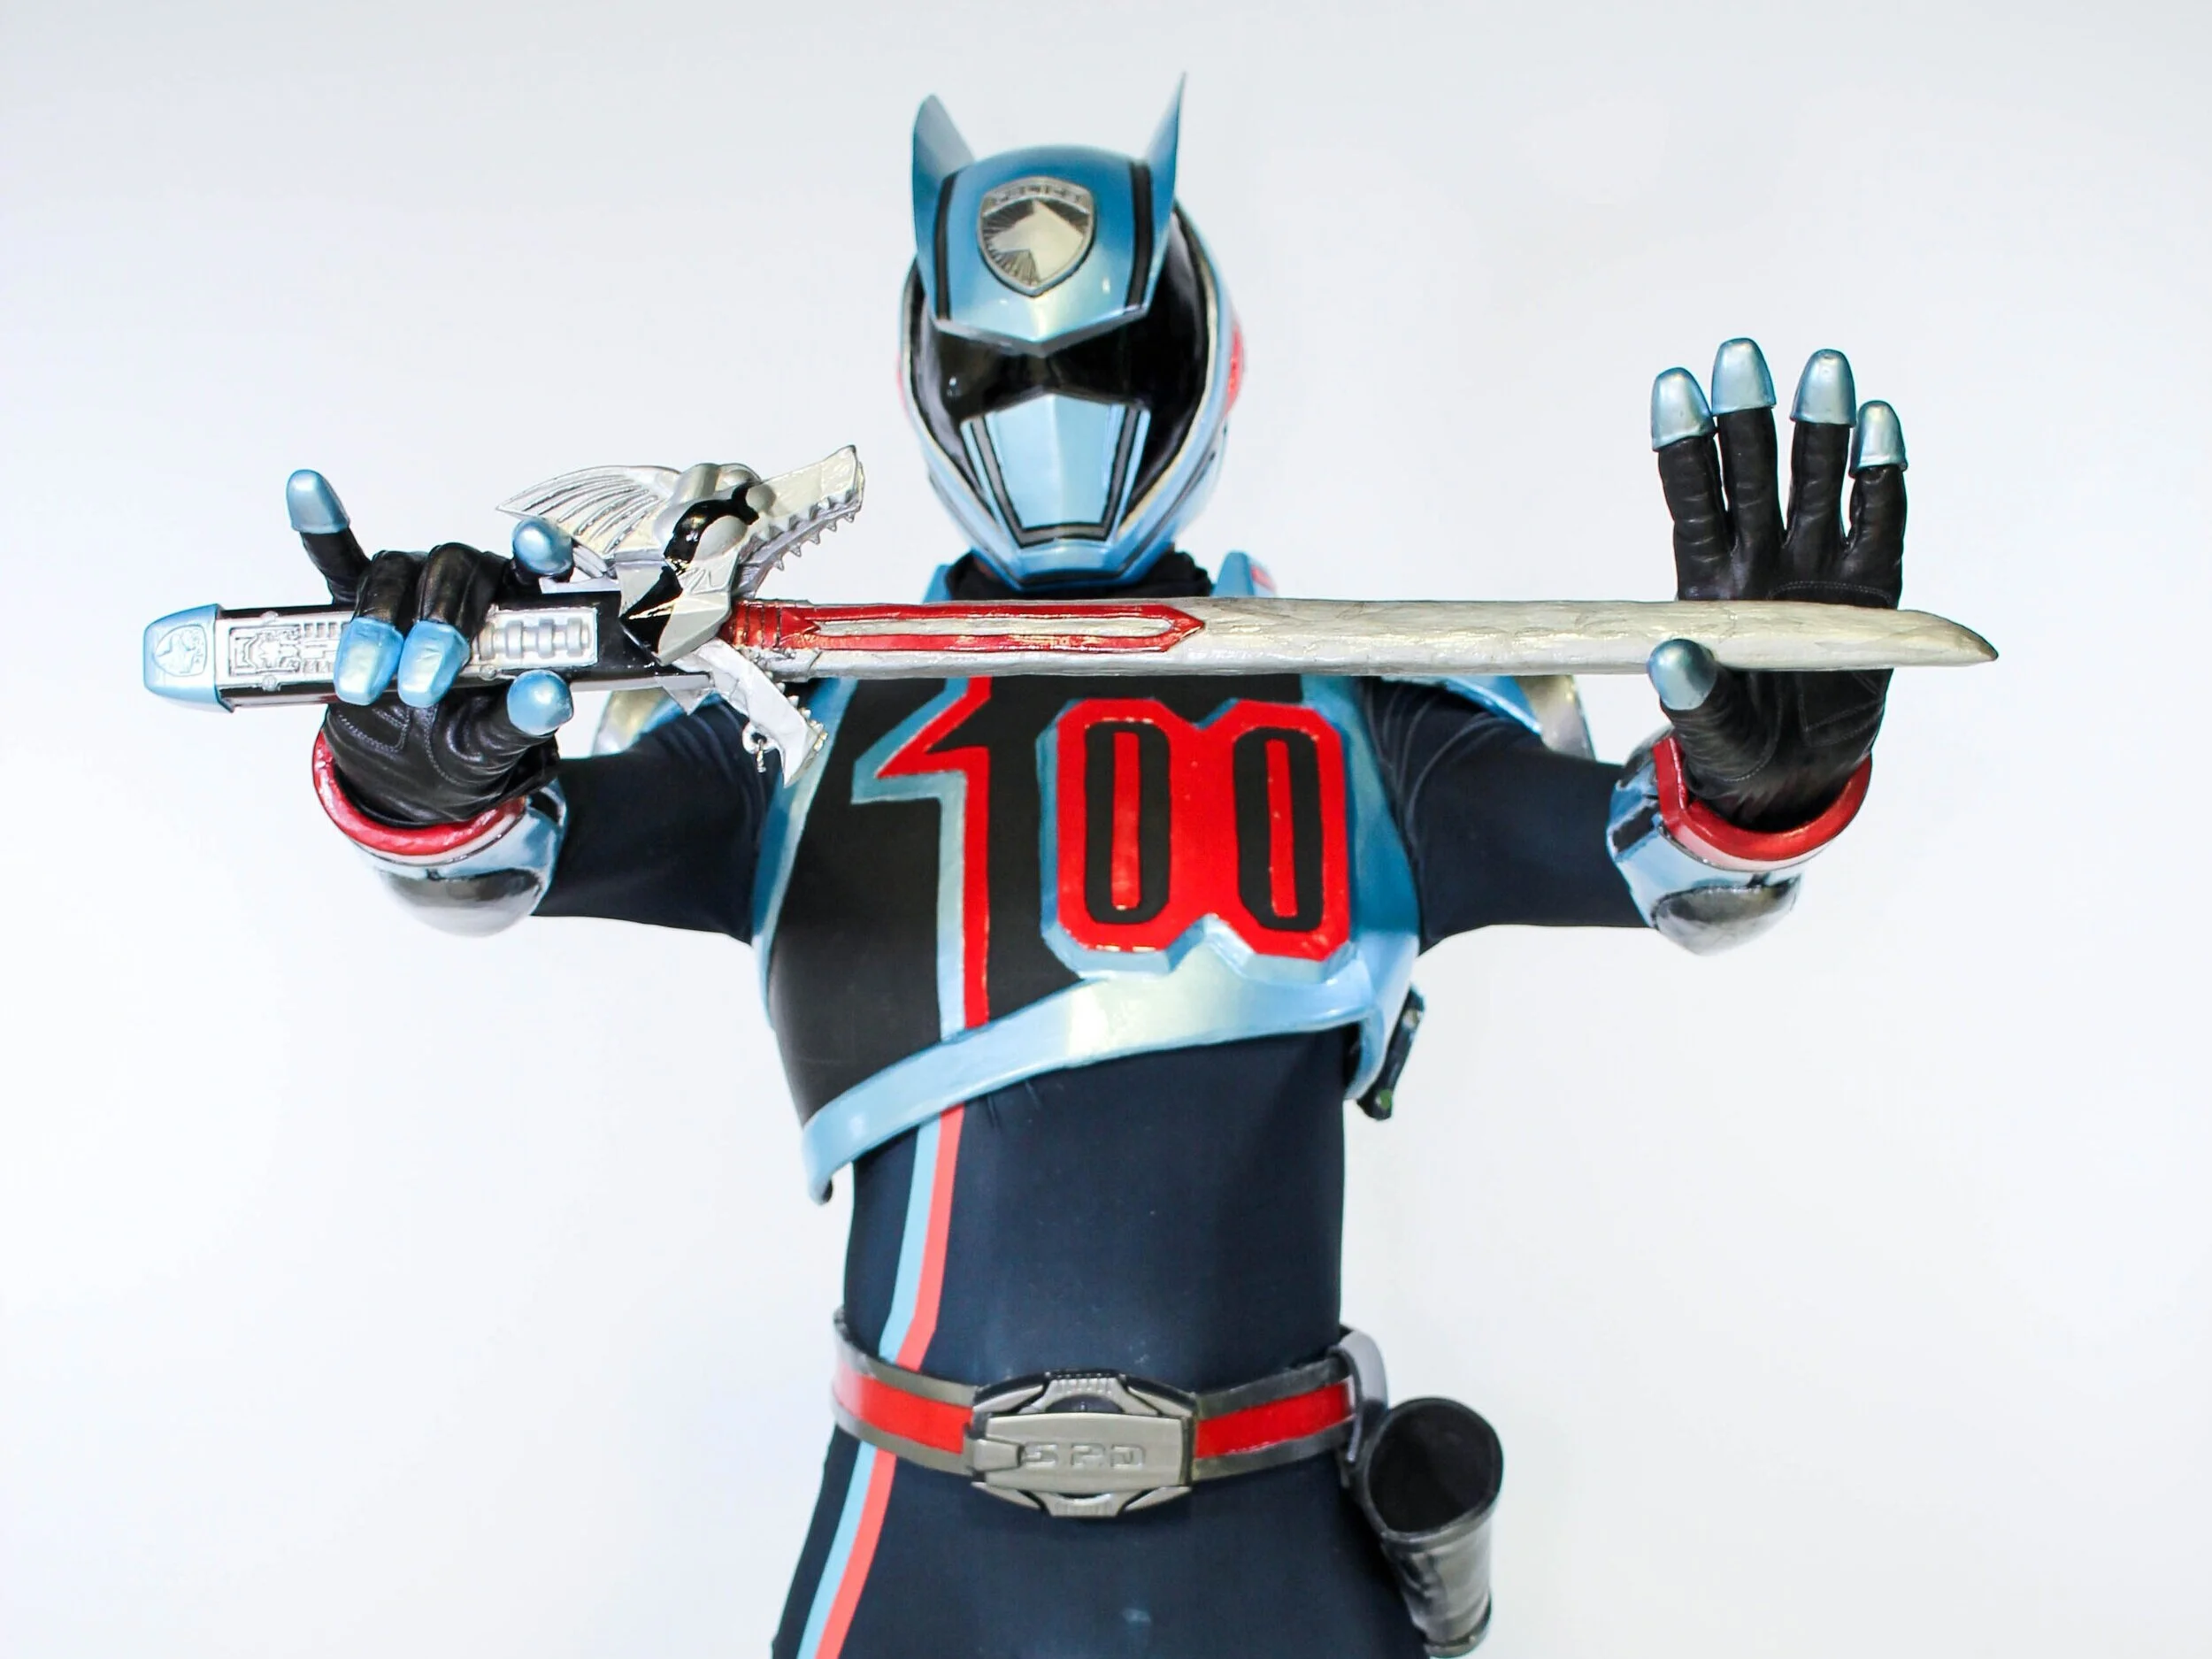
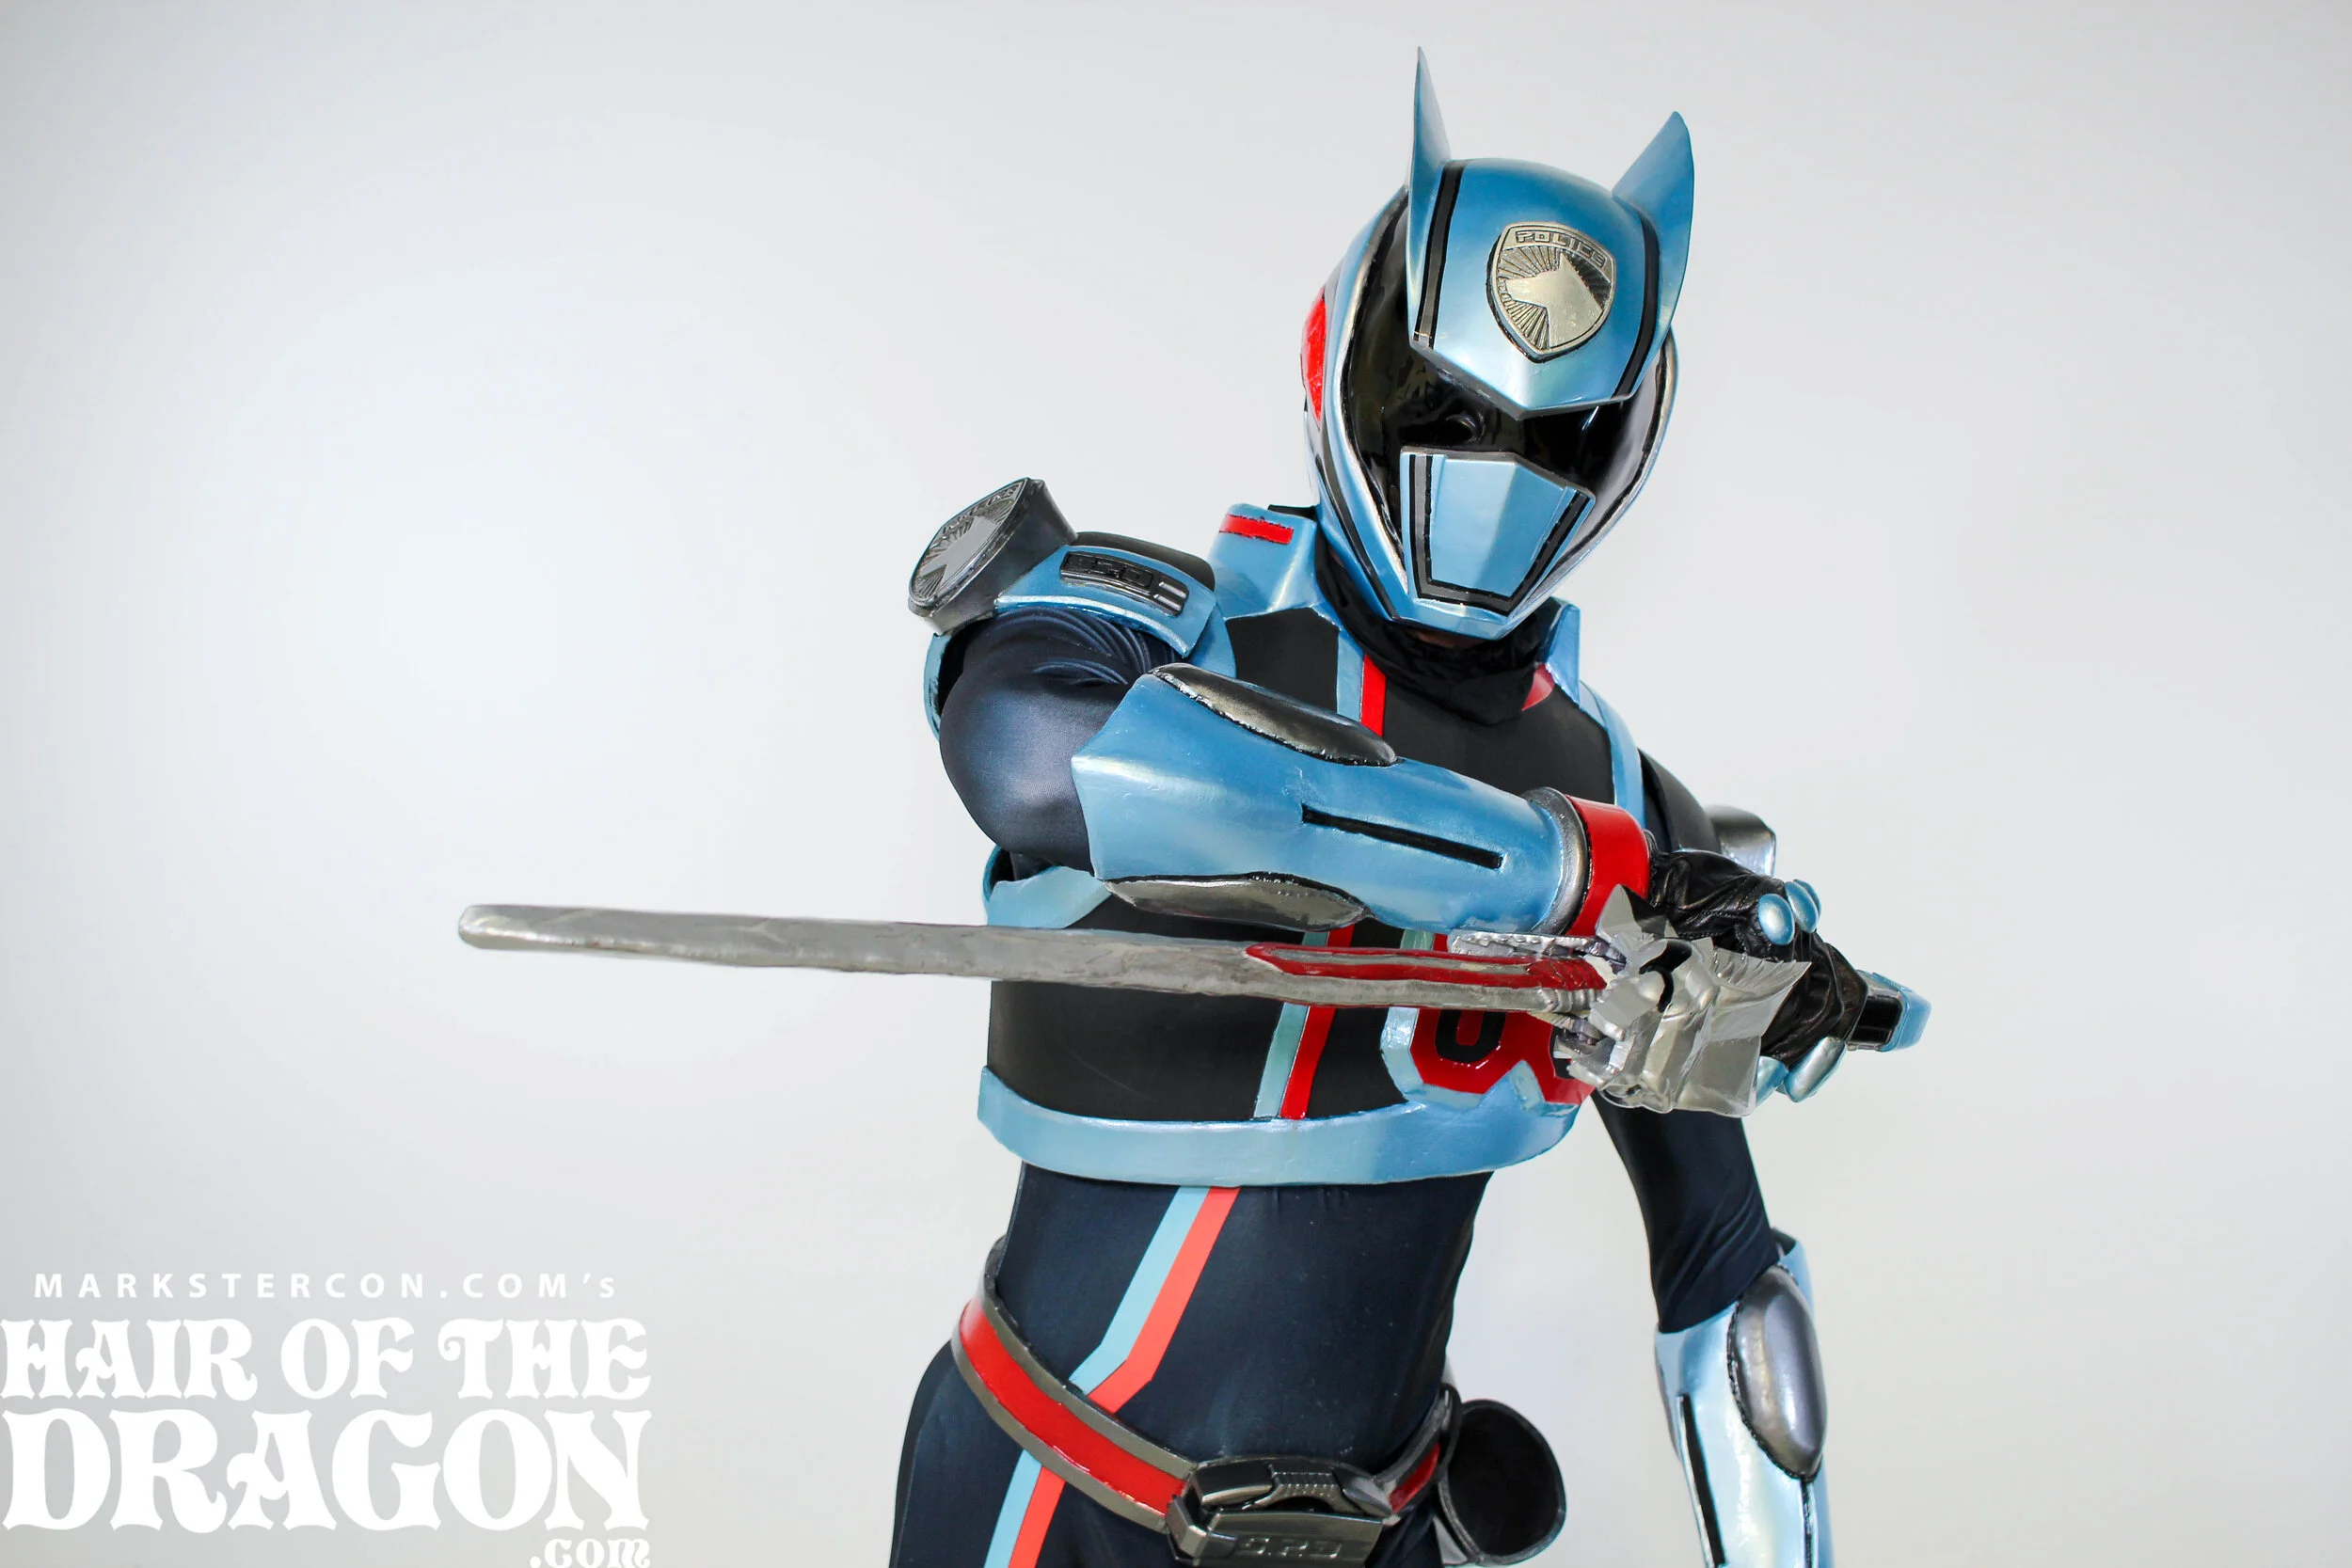
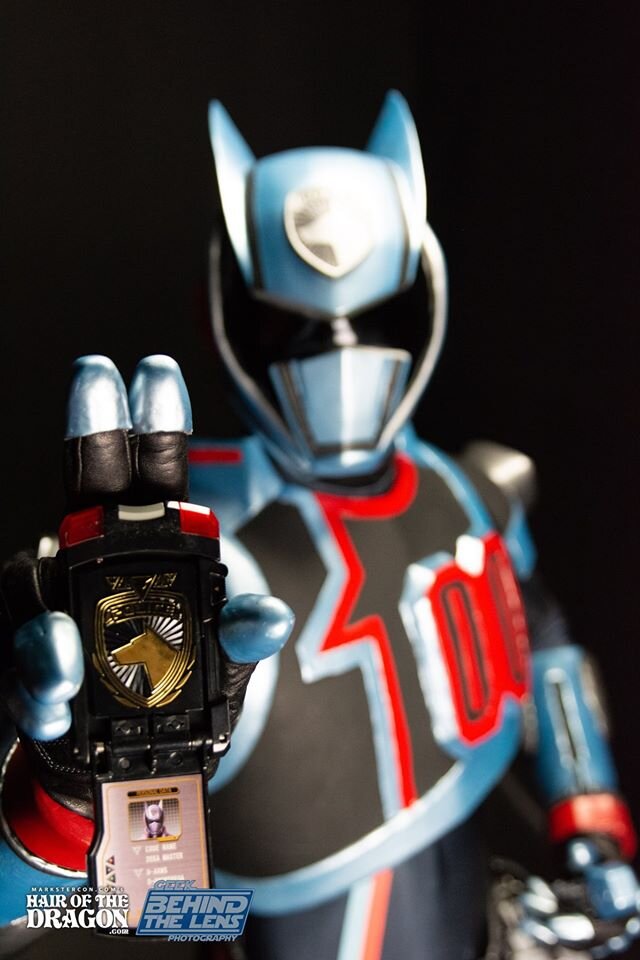
HAG Party 2019

HAG Party 2019

HAG Party 2019
HAG Party 2019